
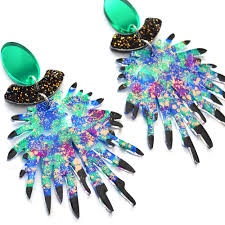
A Beginner's Guide to Laser Cutting Acrylic Jewelry
How to make acrylic jewelry by laser cutter
Laser cutting is a popular technique used by many jewelry designers to create intricate and unique pieces. Acrylic is a versatile material that is easy to laser cut, making it a great choice for jewelry-making. If you're interested in creating your own laser cut acrylic jewelry, this beginner's guide will walk you through the process step-by-step.
Step 1: Choose Your Design
The first step in laser cutting acrylic jewelry is to choose your design. There are many different designs available online, or you can create your own custom design using software like Adobe Illustrator or CorelDRAW. Look for a design that matches your style and preferences, and that will fit within the size of your acrylic sheet.
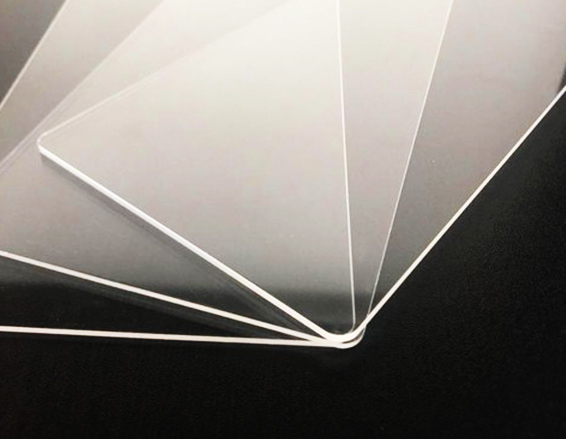
Step 2: Select Your Acrylic
The next step is to select your acrylic. Acrylic comes in a variety of colors and thicknesses, so choose a type that matches your design and preferences. You can purchase acrylic sheets online or at your local craft store.
Step 3: Prepare Your Design
Once you have your design and acrylic selected, it's time to prepare your design for laser cutting. This process involves converting your design into a vector file that the acrylic laser cutter can read. If you're not familiar with this process, there are many tutorials available online, or you can seek the assistance of a professional graphic designer.
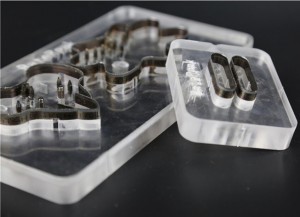
Step 4: Laser Cutting
Once your design is prepared, it's time to laser cut your acrylic. This process involves using a laser cutter to cut your design into the acrylic, creating a precise and intricate pattern. Laser cutting can be done by a professional service or with your own laser cutting machine if you have one.
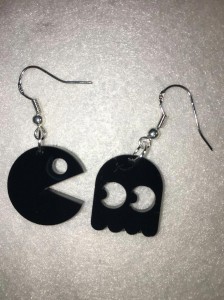
Step 5: Finishing Touches
After the laser cutting is complete, it's time to add any finishing touches to your acrylic jewelry. This can include sanding down any rough edges or adding additional decorative elements like paint, glitter, or rhinestones.
Tips and Tricks for Success
Choose a design that is not too intricate for your level of experience with laser cutting.
Experiment with different acrylic colors and finishes to find the perfect look for your jewelry.
Be sure to use a high-quality acrylic laser cutter to ensure precise and accurate cutting.
Use proper ventilation when laser cutting acrylic to avoid harmful fumes.
Be patient and take your time with the laser cutting process to ensure precision and accuracy.
In Conclusion
Laser cutting acrylic jewelry is a fun and creative way to express your personal style and make unique pieces that you won't find anywhere else. While the process may seem daunting at first, with the right design, acrylic, and finishing touches, you can create stunning and sophisticated jewelry that will be the envy of your friends. Use the tips and tricks provided in this article to ensure your success and create acrylic jewelry that you'll be proud to wear and show off.
Video Display | Glance for Acrylic Laser Cutting
Recommended Laser cutter machine for acrylic


FAQ
Acrylic thickness for jewelry depends on design and cutter power. Here’s the range:
Summary: Most acrylic jewelry uses 1–5mm sheets—thicker acrylic needs more powerful cutters.
Common Range: 1–3mm is best for delicate pieces (earrings, pendants). Thicker acrylic (4–5mm) works for bold designs (bracelets).
Cutter Limitations: A 40W laser cuts up to 5mm acrylic; 80W+ cuts thicker (but jewelry rarely needs >5mm).
Design Impact: Thicker acrylic needs simpler designs—intricate patterns get lost in thick material.
Yes—vector-based software ensures laser cutters read designs correctly. Here’s what to use:
Vector Files: Laser cutters need .svg or .ai files (vector format) for precise cuts. Raster images (e.g., .jpg) won’t work—software traces them into vectors.
Free Alternatives: Inkscape (free) works for simple designs if you can’t afford Adobe/Corel.
Design Tips: Keep lines >0.1mm thick (too thin breaks during cutting) and avoid tiny gaps (traps laser heat).
Finishing ensures smooth, professional-looking edges. Here’s how:
Sanding: Use 200–400 grit sandpaper to remove laser “burn” marks.
Flame Polishing: A small butane torch lightly melts edges for a glossy finish (works best on clear acrylic).
Painting: Add color to cut-out areas with acrylic paint or nail polish for contrast.
Any questions about the operation of how to laser engrave acrylic?
Post time: Apr-06-2023