
How to Achieve a Perfect Wood Laser Engraving
— Tips and Tricks for Avoiding Burning
Laser engraving on wood is a popular way to add a personalized touch to wooden items. However, one of the challenges of laser wood engraving is avoiding burning, which can leave an unsightly and permanent mark. In this article, we will provide tips and tricks for achieving a perfect wood laser engraving without burning, using a wood laser engraver.

• Step 1: Choose the Right Wood
The type of wood you choose can have a significant impact on the outcome of your engraving when using a laser engraving machine for wood. Woods with a high resin content, such as pine or cedar, are more prone to burning than hardwoods like oak or maple. Choose a wood that is suitable for laser engraving, and with a low resin content to minimize the chance of burning.
• Step 2: Adjust the Power and Speed Settings
The power and speed settings on your wood laser engraver can have a significant impact on the outcome of your engraving. A high power setting can cause the wood to burn, while a low power setting may not produce a deep enough engraving. Similarly, a slow speed setting can cause burning, while a high speed setting may not produce a clean enough engraving. Finding the right combination of power and speed settings will depend on the type of wood and the depth of engraving desired.
• Step 3: Test on Scrap Wood
Before engraving on your final piece, it is always recommended to test on a scrap piece of the same type of wood on your laser engraver for wood. This will allow you to fine-tune your power and speed settings to achieve the desired result.
• Step 4: Use a High-Quality Lens
The lens on your wood laser engraver can also have an impact on the outcome of your engraving. A high-quality lens can produce a sharper and more precise engraving, which reduces the chances of burning.

• Step 5: Use a Cooling System
Dirt, dust, and other particles on the wood surface can interfere with the engraving process and cause burning when engraved with a wood laser engraver. Clean the wood surface before engraving to ensure a smooth and even engraving.
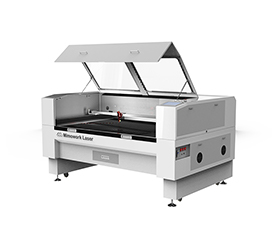
Recommended Laser Machine for Wood

• Step 6: Clean the Wood Surface
A cooling system can help to prevent burning by keeping the wood and the laser engraver at a consistent temperature. A cooling system can be as simple as a small fan or as advanced as a water cooling system.
• Step 7: Use Masking Tape
Masking tape can be used to protect the wood surface from burning. Simply apply masking tape to the surface of the wood before engraving, and then remove it after the engraving is complete.
Video Display | How to laser engrave wood
In conclusion, achieving a perfect wood laser engraving without burning requires careful attention to the type of wood, power and speed settings, lens quality, cooling system, wood surface cleanliness, and the use of masking tape. By following the steps outlined in this article, and using the tips and tricks provided, you can produce a high-quality wood laser engraving that adds a personal and professional touch to any wooden item. With the help of a wood laser engraver, you can create beautiful and unique engravings on wood that will last a lifetime.
Get a quote about the wood laser engraver machine?
Post time: Feb-22-2023