
Laser Cut Maps: Material Selection and Operation
Best Materials for Laser Cut Map

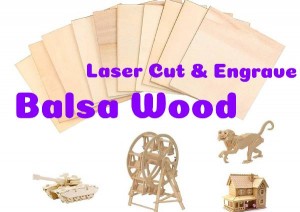
When you make a laser cut map, the material choice directly affects the final look. The two most common categories are wood and acrylic. Below we focus on laser cut wood and laser cutting of acrylic because they offer the best results for most projects.
| Material | Recommended Type | Advantages | Disadvantages |
|---|---|---|---|
| Birch plywood | 3mm thick, fine grain, few voids | Clean edges, warm texture, easy to glue, moderate cost | Prone to warping when moist, slight burn marks on edges |
| Basswood plywood | 3mm thick, light color, nearly grain-free | High engraving contrast, good for fine details | Softer than birch, slightly lower strength |
| MDF | 3–6mm thick, uniform surface | Inexpensive, flat surface | Heavy smoke, dark edges, not waterproof |
| Cast acrylic | 3mm thick, clear or colored | Excellent light transmission, edges can be flame‑polished to crystal clear, modern look | Easily scratched, strong odor during cutting, flame‑polishing requires skill |
| Extruded acrylic | 3mm thick | Cleaner cut edges out of the machine, slightly cheaper | Bubbles or burns when flame‑polished, not for high‑quality projects |
Recommendation: Beginners should start with 3mm birch plywood for their first laser cut map. For laser cut city maps, basswood provides higher contrast for roads. If you want a modern backlit look, master the laser cutting of acrylic – cast acrylic is the way to go.
Which Laser Type Is Best for Laser Cut Maps?
UV lasers offer high precision but are expensive and generally unable to cut—they are mainly used for fine engraving on thin materials. Diode lasers are affordable but cut slowly, produce poor edge quality (burn marks on wood, and they struggle with acrylic), and are not suitable for thick materials. Fiber lasers are designed for metals—they can mark but cannot cut non-metals like wood or acrylic.
In contrast, a CO₂ laser operates at a wavelength that is strongly absorbed by common map materials such as plywood, basswood, and cast acrylic. It delivers clean, fast cuts with good edge quality, handles thicknesses from 3 mm up to 10 mm or more, and offers a balanced cost‑to‑performance ratio.
For all these reasons, CO₂ is the most suitable laser for producing high‑quality laser cut maps.
Here is a video with a detailed introduction to CO2 laser machines. You can click here to watch it.
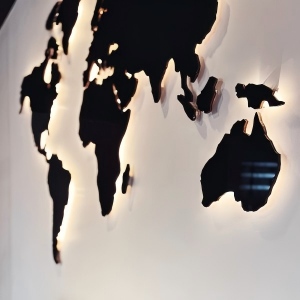
What Types of Maps Can You Laser Cut?
City Maps
Flat maps of streets, roads, rivers, parks, landmarks.
Laser cutting: single-layer (engraved streets + cut outline) or two-layer (base + top cutout). Key: clear road network & labels.
Parameters: line width 0.1–0.3mm, shallow engraving, high contrast.
Examples: Manhattan, Paris.
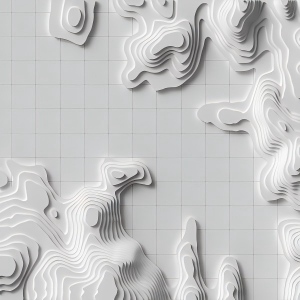
Topographic Maps
Contour lines showing elevation. Flat: engraved contours on one sheet. 3D stacked: each contour/elevation interval cut as separate layer, glued from low to high. Needs DEM data.
Parameters: 5–15 layers, 3–6mm each, precise alignment.
Examples: Grand Canyon, Mt. Fuji.
3D Layered Maps
Geographic info via multiple physical layers (city, terrain, or both). Not limited to contours: can use districts, building height, land cover. Designer chooses shape, color, spacing. Layers can be discontinuous (e.g., water → greenspace → buildings) with gaps.
Examples: San Francisco (by elevation), Tokyo’s 23 wards (one per layer).
Preparation Work for Laser Cut Wood Maps
| Preparation Step | Specific Tasks | Key Points |
|---|---|---|
| Data acquisition | Download geographic data or a map image of your target area | City maps: OpenStreetMap, Google Maps screenshots; Topo maps: USGS, SRTM elevation data |
| File processing | Convert data into vector format (SVG, DXF, AI) | Use QGIS, Illustrator, Inkscape, or dedicated map generators (Mapbox, Snazzy Maps) |
| Layer design (if multi‑layer) | Assign contours or zones to different layers | Each layer = a different color in LightBurn (distinguish cut from engrave) |
| Material preparation | Select appropriate sheet, check flatness | 3mm birch plywood or cast acrylic – no warping, clean surface |
| Parameter testing | Test power, speed, focus on scrap pieces | Record the best combination: wood often needs low power & high speed; acrylic medium power & lower speed |
| Machine check | Clean lens, check air assist, calibrate focus | Air assist reduces burn marks; wrong focus leads to incomplete cuts or wide kerf |
| Secure material | Use tape, magnets, or weights to prevent shifting | Especially important for multi‑layer cuts – shifting causes misalignment |
Tip: Create a checklist and go through it before every cut to reduce mistakes.
Step-by-Step Operating Procedure for Laser Cut Maps
Confirm the file contains both engrave (streets/text) and cut (outer boundary) elements.
Assign cut lines (red) to “Cut” mode (slower speed, higher power).
Example for 40W CO₂, 3mm birch plywood: Engrave (25% power, 400 mm/s, 300 DPI); Cut (80% power, 12 mm/s, 1 pass).
Use the “Frame” function to preview the cutting area.
Use a focus gauge or ramp test for accuracy.
Verify the engraving is clear and has good contrast.
If not fully cut, reduce speed or increase passes.
Wipe dust with a damp cloth and lightly sand edges (400 grit).
For acrylic: flame‑polish edges and remove protective film.
Machine Recommendations for Laser Cutting of Acrylic and Wood Maps
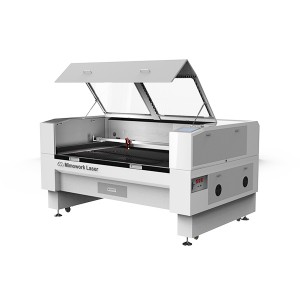
| Dimension | Evaluation |
|---|---|
| Cutting area | 1300×900mm, large enough to arrange multiple maps on one sheet. |
| Multiple maps on one sheet | Very suitable; efficient nesting with software saves material. |
| Speed | Base 400 mm/s meets common cutting needs; upgraded to 2000 mm/s for extremely fast engraving. |
| Expandability | Rich options including power, auto focus, hybrid cutting, and custom sizes – ready for more complex map projects in the future. |
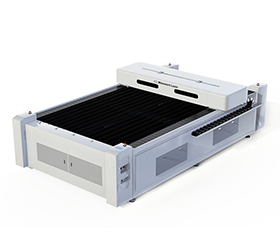
| Dimension | Evaluation |
|---|---|
| Cutting area | 1300×2500mm – extra large, easily accommodates multiple map layouts on one sheet. |
| Multiple maps on one sheet | Ideal – efficient nesting with software, very high material utilization. |
| Speed | Cutting 600 mm/s, engraving 1000 mm/s, plus high acceleration – productivity far exceeds standard machines. |
| Expandability | CCD edge finding, hybrid laser head, auto focus, high power options – ready for the most complex map projects. |
This video introduces how to use a CO₂ laser engraver to laser cut and engrave acrylic, creating products such as LED displays, models, and advertising signs. It demonstrates the process of making a sellable acrylic LED display. In addition, the machine can also process other non-metal materials like wood, plastic, felt, and foam — one machine can meet both custom and mass production needs.
If you are unsure whether your material can be cut by our machine, please feel free to contact us.
FAQ
A: Slight blackening on wood edges is normal (caused by high temperature carbonization). To reduce it: ① turn on air assist to blow away smoke; ② apply masking tape on the sheet before cutting; ③ increase cutting speed and lower power slightly. After cutting, light sanding with 400 grit sandpaper will remove most burn marks.
A:The minimum engraving line width is limited by the laser spot size (typically 0.1–0.2mm). If your design has lines thinner than 0.1mm, increase the stroke width to 0.2–0.3mm in your vector software. Also, using a higher DPI (e.g., 400–600) improves engraving clarity.
A:① Apply wood wax oil or clear varnish after finishing to seal against moisture and dirt; ② avoid direct sunlight and humid environments; ③ attach a backing board (e.g., thin aluminum sheet or stiff cardboard) to prevent warping; ④ for multi layer stacked maps, make sure each plywood layer is fully dry before gluing.
A: Three common methods: ① add 2–4 alignment holes (e.g., 3mm diameter) at the same positions on every layer, then use rods to align them; ② use the “array/copy” function in your laser software so that all layers share the exact same outer contour; ③ start from the bottom layer and glue each layer manually while pressing, letting the glue set before adding the next layer.


Do you have any other questions about the laser cutting map?
Post time: Jun-15-2026