
How to Engrave Wood:Laser Guide for Beginners
Are you a novice in the world of wood engraving, brimming with eagerness to turn raw wood into works of art? If you've been pondering over how to engrave wood like a pro, our laser guide for beginners is tailor-made for you. This guide is packed with in-depth knowledge, from understanding the laser engraving process to choosing the right machine, ensuring you embark on your engraving journey with confidence.
1. Understand Laser Engraving Wood
Laser engraving on wood is a fascinating process that uses a high-powered laser beam to remove material from the wood's surface, creating intricate designs, patterns, or text.
It operates through a straightforward yet precise process: a concentrated laser beam, generated by an engraving machine, is directed at the wood’s surface. This beam carries high energy, which interacts with the wood by either burning away its outer layers or turning them into vapor—effectively "carving" the desired design into the material.
What makes this process consistent and customizable is its reliance on software control: users input their designs into specialized programs, which then guide the laser’s path, intensity, and movement.The final look of the engraving isn’t random; it’s shaped by three key factors:laser power, speed and the type of wood.
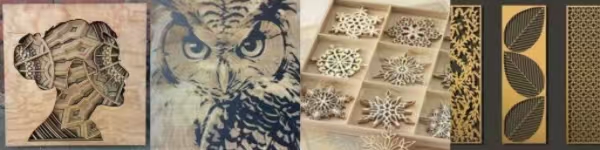
Application of Laser Engraving Wood
2. Why Choose Laser Engraving Wood
Laser Engrave Wood Chips
Laser engraving wood has several advantages.
▪ High Precision and Detail
Laser engraving on wood offers an incredibly high level of precision. The focused laser beam can create intricate patterns, delicate lines, and small text with remarkable accuracy. This precision ensures that the final product looks professional and of high quality, whether it's a personalized gift or a decorative piece for home or office.
▪ Durability and Permanence
Laser engraved designs on wood are highly durable. Unlike painted or decaled designs that can fade, chip, or peel over time, laser-engraved marks are a permanent part of the wood. The laser burns or vaporizes the wood's surface layer, creating a mark that is resistant to wear, scratches, and environmental factors. For businesses using laser engraved wood products for branding, the durability ensures that their logo or message remains visible and intact for years.
▪ Efficiency and Time-Savings
Laser engraving is a relatively fast process. In a small-scale manufacturing setting where multiple wooden products need to be engraved with the same design, the laser engraver can produce consistent results quickly, increasing productivity and reducing production time. This efficiency also means that crafters can take on more projects and meet tight deadlines.
▪ Non-Contact and Clean Process
Laser engraving wood is a non-contact process. This reduces the risk of damaging the wood due to pressure or friction, such as splintering or warping. Additionally, there is no need for messy inks, dyes, or chemicals typically associated with other marking methods, making it a convenient option for both home-based crafters and professional workshops.
3. Recommend Machines
With all those perks of laser emgraving wood, let’s check out our two machines that are built just for this.
They don’t just make the most of laser engraving’s precision and speed, they’ve also got extra tweaks that work great with wood. Whether you’re doing small batches for crafts or ramping up production, there’s one that’ll fit the bill.
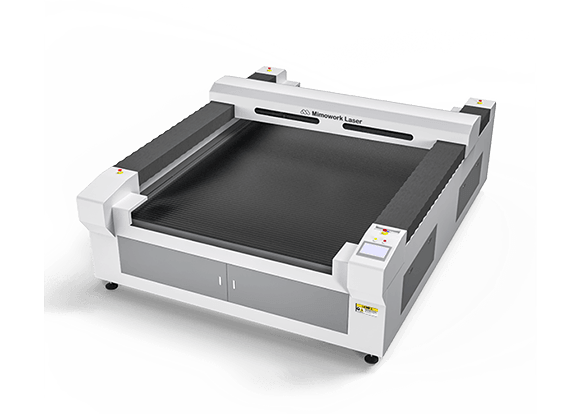
It's perfect for cutting large-sized wooden crafts. The 1300mm * 2500mm worktable features a four-way access design. The ball screw and servo motor transmission system guarantees the stability and precision when the gantry moves at high speed. As a laser wood cutting machine, MimoWork has equipped it with a high cutting speed of 36,000mm per minute. With optional high-power 300W and 500W CO2 laser tubes, this machine can cut extremely thick solid materials.
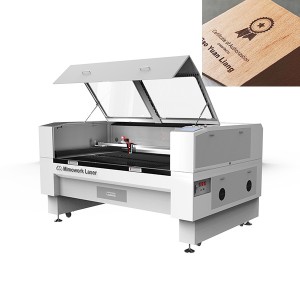
Wood Laser engraver that can be fully customized to your needs and budget. The Mimowork’s Flatbed Laser Cutter 130 is mainly for engraving and cutting wood (plywood, MDF). For fitting with varied and flexible production for different format materials, MimoWork Laser brings a two-way penetration design to allow engraving the ultra-long wood beyond the working area. If you are seeking higher-speed wood laser engraving, DC brushless motor will be a better choice due to its engraving speed can reach 2000mm/s.
Can't Find What You Want?
Contact Us for A Custom Laser Engraver!
4. Fast Track from Setup to Perfect Engraving
Now that you’ve seen the machines, here’s how to put them to work—simple steps to get those wood projects cut perfectly.
Preparation
Before starting, ensure your machine is properly set up. Place the machine on a stable, flat surface. Connect it to a reliable power source and make sure all the cables are securely plugged in.
Design Import
Use the machine's software to import your wood engraving design. Our software is intuitive, allowing you to resize, rotate, and position the design as needed on the virtual workspace.
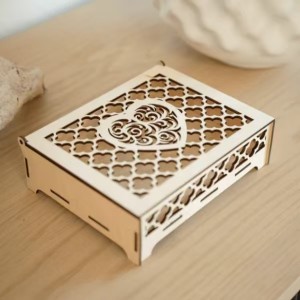
Laser Engraved Craft Box
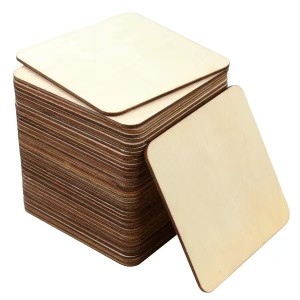
Material Setup
Select the appropriate wood for your project. Place the wood firmly on the machine's worktable, ensuring it doesn't move during the engraving process. For our machine, you can use the adjustable clamps to hold the wood in place.
Power and Speed Settings
Based on the type of wood and the desired engraving depth, adjust the power and speed settings on the machine.
For softwoods, you can start with a lower power and higher speed, while hardwoods may require higher power and a slower speed.
Pro Tip: Test a small area of the wood first to ensure the settings are correct.
Engraving
Once everything is set, start the engraving process. Monitor the machine during the initial few seconds to make sure everything is going smoothly. Our machine will move the laser head precisely over the wood, creating your engraving.
▶Related Videos
Best Way to Start a Laser Engraving Business
Cut & Engrave Wood Tutorial
How to Laser Engraving Photos on Wood
5. Avoid Common Laser Engraving Wood Mishaps
▶ Fire Hazard
Wood is flammable, so it's crucial to take precautions. Keep a fire extinguisher nearby when using the machine.
Avoid engraving thick layers of wood at once, as this can increase the risk of overheating and potential fire.
Ensure that the ventilation system of the machine is working properly to remove any smoke and heat.
▶ Inconsistent Engraving
One common issue is inconsistent engraving depth. This can be caused by uneven wood surfaces or incorrect power settings.
Before starting, sand the wood to make sure it's flat. If you notice inconsistent results, double-check the power and speed settings and adjust them accordingly. Also, ensure that the laser lens is clean, as a dirty lens can affect the laser beam's focus and cause inconsistent engravings.
▶ Material Damage
Using the wrong power settings can damage the wood. If the power is too high, it can cause excessive burning or charring. On the other hand, if the power is too low, the engraving may not be deep enough.
Always do test engravings on scrap pieces of the same wood type to find the optimal settings for your project.
6. FAQs about Laser Engrave
A wide range of wood types can be used for laser engraving. Hardwoods like maple, cherry, and oak, with their fine grains, are ideal for detailed engravings, while softer woods such as basswood are great for achieving smooth, clean results and are often recommended for beginners. Even plywood can be engraved, offering different textures and cost-effectiveness options.
Of course!
Laser engraving on wood typically results in a natural, burned-looking color. However, you can paint the engraved area after the process to add color.
Start by using a soft-bristled brush like a paintbrush or toothbrush to gently sweep away dust and small wood shavings from the carved details and crevices, this prevents pushing debris deeper into the design.
Then, wipe the surface lightly with a slightly damp cloth to remove any remaining fine particles. Let the wood dry completely before applying any sealant or finish. Avoid using harsh chemicals or excessive water, as these can damage the wood.
You can use polyurethane, wood oils like linseed or tung oil, or wax to seal carved wood.
First, clean the carving to remove dust and debris. Then apply the sealer evenly, following the product instructions. Multiple thin coats are often better than one thick one.
Want to Invest in Wood Laser Machine?
Post time: Aug-14-2025