

Common Pitfalls in Laser Engraving Ceramic Tiles and How to Fix Them
Many hobbyists buy white tiles, fire up their lasers, and get disappointing results—no visible marks, patterns that wipe off, or burnt, blurry portraits. Can you laser engrave tiles? Absolutely! Tiles are a popular project due to low cost and high value. Failures come from wrong equipment, poor surface prep, or incorrect settings. This guide shows you how to achieve high-contrast, permanent, professional tile engravings.
Common Pitfalls in Laser Engraving Ceramic Tiles
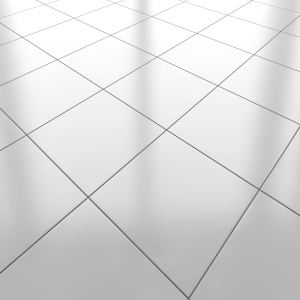
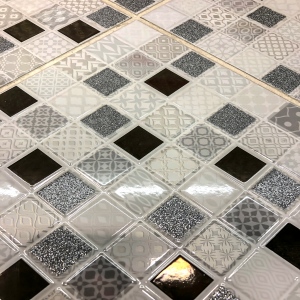
Pitfall 1: Laser Scans Across White Tile, But Leaves Nothing Visible
Root Cause: Glazed ceramic tiles have a smooth, white surface that reflects laser light like a mirror. Diode lasers with wavelengths around 455nm are especially problematic—the beam either passes through or reflects off the glaze without generating enough heat to leave any mark.
Solution: Use the Norton White Tile Method (NWT). Before engraving, apply a thin coat of flat white spray paint containing titanium dioxide (TiO₂). The laser's high heat causes the TiO₂ to chemically sinter with the tile glaze, permanently fusing the mark into the surface.
Recommended Sprays: Krylon ColorMaxx Flat White or Rust-Oleum Flat White—both are rich in TiO₂.
Pitfall 2: Engraved Pattern Wipes Off with a Finger
Root Cause: Coating too thick: The laser energy is consumed by burning through the paint layer and never reaches the glaze surface
Insufficient power: Laser power is too low or speed is too fast, failing to reach the temperature threshold where TiO₂ fuses with the glaze
Solution: Apply a thin, even coat: Just enough to barely obscure the tile's original color
Run a power/speed test matrix: Use LightBurn's "Material Test" tool on scrap tiles to find the optimal parameter range where the mark stays permanent even after scrubbing
Pitfall 3: Photo Portraits Come Out Burnt, Blurry, or Too Grainy
Root Cause: No dithering applied: Importing color or grayscale photos directly—lasers cannot produce true grayscale; they can only express shading through "on/off" dot patterns
DPI too high or too low: High DPI causes overlapping spots and overheating; low DPI results in coarse, grainy images
Solution: Apply dithering: In LightBurn, set Image Mode to Stucki or Jarvis dithering algorithms
DPI control: Recommended range is 254-300 DPI (corresponding to 0.08-0.1mm spacing)
Pitfall 4: Why CNC Engraving Tiles Is Not Recommended
Uneven Surface: Tiles have microscopic surface variations; even 0.1mm error can cause inconsistent line widths
High Tooling Costs: Tiles are extremely hard—regular tools dull instantly; diamond-tipped tools are expensive
Laser non-contact processing avoids both problems. Even with slight surface variations, as long as the material stays within the focal depth, the laser produces consistent, uniform line widths.
Pitfall 5: The True Nature of Tile Glaze
Tile glaze is essentially glass. This means:
The laser does not "vaporize" the ceramic to create depth—it only produces micro-cracks on the surface, creating a frosted, matte finish
Using high power to forcefully carve deeper only leads to glaze cracking, blurred edges, and scorching of the ceramic body
Conclusion: To achieve high-contrast black marks on white tiles, do not rely on brute power. You must use the NWT method (titanium dioxide sintering) or laser marking compound.
Step-by-Step Guide to Laser Engraving Ceramic Tiles
Step 1: Clean and Degrease
Wipe the tile surface thoroughly with isopropyl alcohol (IPA) or rubbing alcohol. Even a trace of finger oil can cause uneven paint adhesion or peeling.
Step 2: Apply a Thin TiO₂ Coating
Use a flat white spray paint containing titanium dioxide (TiO₂). Spray from 20-30cm away with a quick sweeping motion. Keep it thin! Allow 15-30 minutes to air dry. Alternatively, you can use a homemade TiO₂ alcohol suspension—which is easier to clean up.
Step 3: Software Setup and Focus
Import your design, set it to dithering mode, and focus the laser precisely on the tile surface. Focus is critical. If the focus is off, the beam spreads out and the engraved lines will appear gray and easily wipe away.
Step 4: Start Laser Engraving
Run the engraving job. The process will produce smoke and odor from burning paint. Ensure proper ventilation—use an exhaust system, or work in a well-ventilated garage or outdoor space.
Step 5: Clean and Remove the Coating
After engraving, wipe the tile with acetone or paint thinner. The unexposed white primer washes away easily, while the laser-sintered areas leave behind a permanent, glossy, deep black mark.
Bonus: The Eco-Friendly Water-Based TiO₂ Method
Traditional NWT method uses solvent-based spray paints with strong odors and requires acetone for cleanup.
Application: Use a mini foam roller to apply a thin, even layer of diluted titanium white acrylic paint or homemade TiO₂ alcohol suspension
Quick drying: Blow-dry with a cool setting for 1 minute—odor-free and safe for indoor use
Easy cleanup: After engraving, rinse under warm water with a dish sponge. The unsintered white coating washes off instantly, revealing a perfect deep black permanent pattern—no chemicals needed!
Do you have any questions about the steps for laser engraving ceramic tiles?
Which Laser Machine Is Best for Engraving Ceramic Tiles?
The most common laser types on the market are diode lasers, CO₂ lasers, and fiber lasers. Here's why CO₂ laser engraving machines stand out for tile engraving:
Natural Wavelength Advantage: CO₂ lasers operate at 10.6μm—a wavelength that is readily absorbed by glass, ceramics, and glazed surfaces. This means they can interact with the tile surface directly, with minimal or no chemical coatings required.
Direct Engraving Capability: With a powerful CO₂ laser, you can engrave directly on dark or colored tiles without any coating, producing a frosted glass-like finish through micro-fracturing. Even when using the NWT method on white tiles, CO₂ lasers can complete the job 3-5 times faster than diode lasers—with deeper, richer black results.
High Efficiency and Throughput: For commercial use or batch production, a 10cm × 10cm tile that might take a diode laser 20-40 minutes to engrave can be completed in just 5-8 minutes with a 40W-60W CO₂ laser.
| Laser Type | Wavelength | Performance on Tiles | Speed & Efficiency | Best For |
|---|---|---|---|---|
| Diode Laser | ~455 nm | Requires NWT coating; cannot engrave bare glazed tiles directly | Slow | Hobbyists on a budget; DIY enthusiasts |
| CO₂ Laser (Best Choice) | 10.6 μm | Excellent. Direct engraving on some tiles; ultra-fast sintering with coating | Very fast; extremely sharp detail | Workshops, side-hustle sellers, quality-focused makers |
| Fiber Laser | ~1064 nm | Designed primarily for metals/plastics; not the optimal choice for ceramics | Fast but small work area | Industrial marking or metal-focused custom work |
Recommended CO₂ Laser Parameters for Ceramic Tile Engraving
Note: Actual power output, lens condition, and tile glaze composition vary across different laser brands. The following parameters are a golden baseline for common 40W-60W CO₂ laser engraving machines using the NWT method (with flat white spray paint). Use these as a starting point and fine-tune accordingly:
| Parameter | Recommended Value | Notes |
|---|---|---|
| Laser Power | 15% – 25% | For a 50W machine, this equals approximately 8W – 12W actual output. Avoid high power—excessive heat can cause the glaze to crack and spall. |
| Engraving Speed | 250 – 350 mm/s | Adjust based on your machine's performance and coating thickness. |
| Line Interval (Scan Gap) | 0.085 – 0.1 mm | Equivalent to approximately 254 – 300 DPI. |
| Air Assist | ON (Low Flow) | Use a gentle airflow to clear paint-burning smoke and protect the lens. Avoid high airflow, which can cool the sintering zone and prevent proper fusing. |
Recommended Laser Machines for Ceramic Tile Engraving
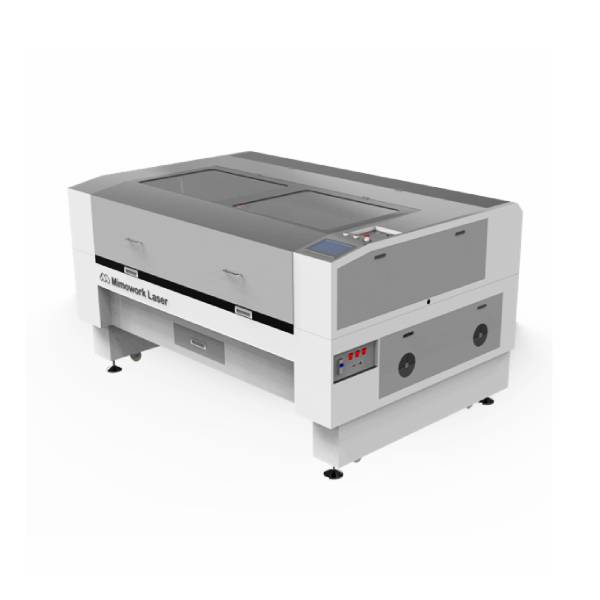
| Dimension | Specific Parameter/Advantage | Detailed Description |
|---|---|---|
| Engraving Area | 1000×600mm / 1300×900mm / 1600×1000mm (Customizable) | Supports batch engraving of ceramic tiles and accommodates oversized tiles beyond the working area for flexible processing. |
| Engraving Precision | Repositioning accuracy ≤±0.05mm | Ensures clear, fine engraving of patterns, text, and logos on ceramic surfaces with smooth edges and no chipping — ideal for decorative tiles, feature walls, and custom designs. |
FAQ
A: Absolutely not—as long as the sintering is successful. The black mark created by TiO₂ sintering on the glaze is chemically stable and extremely durable. It is heat-resistant, fully waterproof, and scratch-resistant. You can scrub it with steel wool and dish soap, and the pattern will remain perfectly intact. It is an excellent choice for high-quality, waterproof coasters.
A: This is usually caused by loose belts or mechanical vibration. During high-speed reciprocating motion on a CO₂ laser, a loose belt can cause beam positioning errors. Also, check if your Overscan setting is enabled. Enabling overscan prevents edge burning caused by localized energy buildup when the laser decelerates at the ends of each pass.
A: Yes. In addition to flat spray paint, you can use laser marking compounds such as CerMark or LaserBond. Apply the compound to the tile, engrave, and wash it off—the result is an exceptionally deep, pure black mark with even better contrast than spray paint. The only drawback is that marking compounds are expensive, making them less suitable for low-cost batch production.
A: This is known as "coating texture effect." If you applied the coating with a brush, the brush strokes create uneven thickness, causing inconsistent laser absorption. Switch to a high-density sponge or foam roller for application instead. Remember: the thinner and more even the coating, the finer and more flawless the laser-sintered grayscale result will be.
Do you have any other questions about laser engraving ceramic tiles?
Post time: Jul-17-2026