
Stain Wood for Laser Cut and Engrave: Pre-Staining vs. Post-Staining Application Guide & Pro Tips
There is a common challenge when you stain wood for laser cut projects. Should the staining be done before or after cutting? The answer is simple. It depends on the effect you want. Pre-staining gives you an even base color. Post-staining delivers sharp, high-contrast details. The two approaches differ significantly in finish, efficiency, and cleanup. Not sure which one is right when you stain wood for laser cut? Let me break it down for you.
Contents:
Which Wood Types Work Best for Laser Cutting and Engraving Wood Coating?
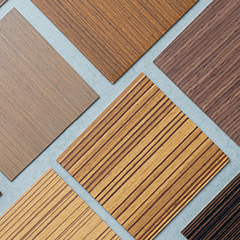
Woodsheet
Achieving a flawless finish relies heavily on selecting the right canvas. When it comes to laser cutting and engraving wood, not all timber species react to pigmentation and high heat the same way.
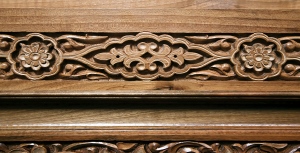
Light-colored, tight-grained hardwoods and premium plywoods are the absolute best candidates for coating. Materials like Basswood, Maple, and Birch are highly recommended because their pale natural tones provide a clean backdrop for any wood stains. Basswood is incredibly consistent for intricate work, while Maple offers an elegant, smooth finish. On the flip side, heavily grained woods like Oak or Ash can absorb pigments unevenly, leading to a blotchy appearance after being processed by a laser cutting and engraving machine for wood.
Applications for Staining Wood Before Laser Engraving and Cutting
Pre-staining your material is the ultimate strategy when your project demands precision, speed, and crisp visual hierarchy. This workflow is highly favored in commercial production and industrial design.
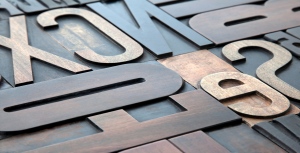
①Custom Business Signage
Creating logos with text requires absolute clarity. Staining beforehand guarantees that letters remain sharp and readable from a distance.
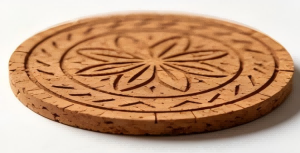
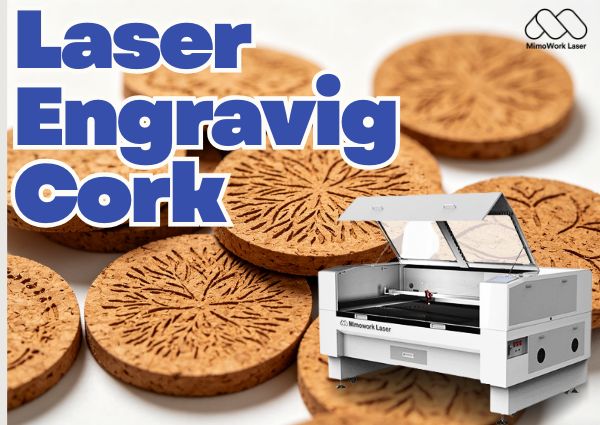
②Small-Batch Products
If you are batch-producing items like coasters, keychains, or jewelry, preparing large pre-stained blanks saves massive amounts of time. You can cut and engrave simultaneously, and the pieces are retail-ready right out of the machine.
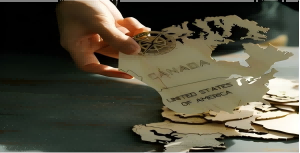
③Detailed Vector Maps
For complex geometric layouts, pre-staining allows the laser to etch away distinct contrast lines without any risk of wet dye bleeding into intricate gridlines later.
Applications for Staining Wood After Laser Engraving and Cutting
While pre-staining wins on efficiency, staining laser engraved wood after processing holds a unique, irreplaceable value for specific artistic and stylized applications.

①Vintage and Rustic Artwork
When you apply tint to an already engraved surface, the char left by the laser reacts with the pigment, making the engraved grooves exceptionally dark and deep. This is perfect for creating weathered, antique-looking plaques or pirate-style treasure maps.
②3D Layered Reliefs
If your artwork relies on deep, multi-pass engraving to create physical depth, post-staining allows the pigment to coat the vertical walls of the carved wood evenly, blending the shadows beautifully.
③Distressed Home Decor
If your goal is to sand down the top surface afterward to create a "shabby chic" or distressed look, post-processing tinting gives you the freedom to heavily manipulate the final texture.
Should Wood Be Stained Before or After Laser Cutting and Engraving?
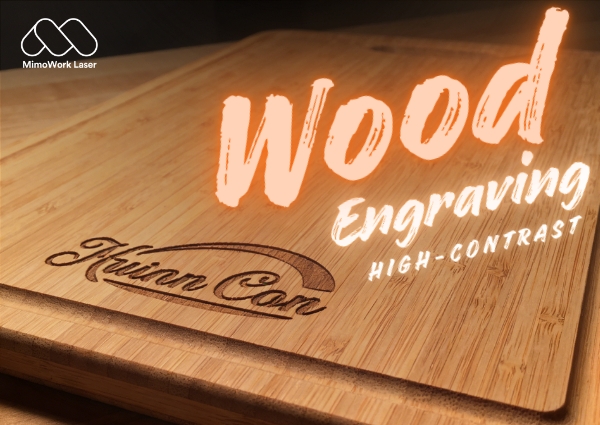
Staining Before Processing (The Clean & High-Contrast Approach): When you apply wood stains first—and seal it with a light topcoat—the laser vaporizes the dark surface layer, exposing the lighter, natural wood fibers underneath. This creates a striking, crisp contrast. Furthermore, the pre-applied finish acts as a protective shield; the sticky smoke and yellow resin stains generated during the process sit on top of the coating and can be wiped away effortlessly with a damp cloth or alcohol, leaving your surface flawless.
Staining After Processing (The Rustic & Deep-Shadow Approach): If you choose the route of staining laser engraved wood after it comes out of the machine, the workflow flips completely. Liquid pigment will naturally flood the engraved crevices. Because the laser-charred wood fibers are highly porous, they absorb the dye aggressively, making the engraved details look exceptionally dark and deep. However, the liquid stain also tends to bleed sideways along the wood grain, which can blur fine lines and muddy the contrast between the engraved areas and the surface.
For the vast majority of commercial and high-precision jobs, staining before engraving is the gold standard. However, if you are chasing a weathered, antique aesthetic, post-staining is the way to go.
Tips for Laser Cutting and Engraving Stained Wood
1.Follow the Golden Workflow: Stain First, Laser Last
Stain the wood before engraving. The laser vaporizes the top stain layer to reveal the lighter natural wood underneath, creating maximum contrast. This sequence also completely eliminates capillary bleeding, preventing wet stain from seeping into raw, lasered grooves.
2.Never Laser Until the Stain has Fully Cured
Allow the stain to cure for 24 to 48 hours before processing. Wet stain—especially oil-based—contains volatile solvents that can ignite into micro-flares under the laser, generating toxic fumes and permanently fouling your focusing lens.
3.Prioritize Water-Based Stains
Opt for water-based stains over oil-based alternatives. They dry significantly faster and release far fewer toxic fumes and pungent odors when vaporized. This keeps your workspace safer and drastically reduces sticky tar buildup on the wood.
4.Apply a Pre-Coat Sealer for Easy Soot Cleanup
Apply a thin clear coat of lacquer or polyurethane after staining but before lasering. The laser cuts cleanly through this barrier, causing all smoke and soot to settle on the clear coat rather than the bare wood. You can then wipe it clean instantly with a damp cloth or alcohol.
5. Always Run Parameter Tests on Matching Offcuts
Wood density and stain absorption vary heavily. Before tackling your final piece, always use a matching offcut to run a power-versus-speed grid test. This ensures you lock in the exact settings needed to cleanly vaporize the stain without over-charring the substrate.
Related Videos:
How to Laser Cut & Laser Engrave Wood?
This video is a beginner-friendly practical guide to CO2 laser cutting and engraving wood. It teaches you how to choose the right wood based on the characteristics of hardwoods, softwoods, and processed woods, and covers key machine settings like focal length adjustment and air assist. The video also shares tips on cutting thin and thick materials, using borax to enhance engraving contrast, and post-processing techniques like sanding and waxing. In short, if you want to start making money with laser woodworking, this video has you covered.
Cut & Engrave Wood Tutorial | CO2 Laser Machine | MimoWork Laser
If you want to make some small wooden decorations with laser cutting, click here.
Machine Recommendations for Laser Cutting and Engraving Stained Wood
| Dimension | Specific Parameter/Advantage | Detailed Description |
|---|---|---|
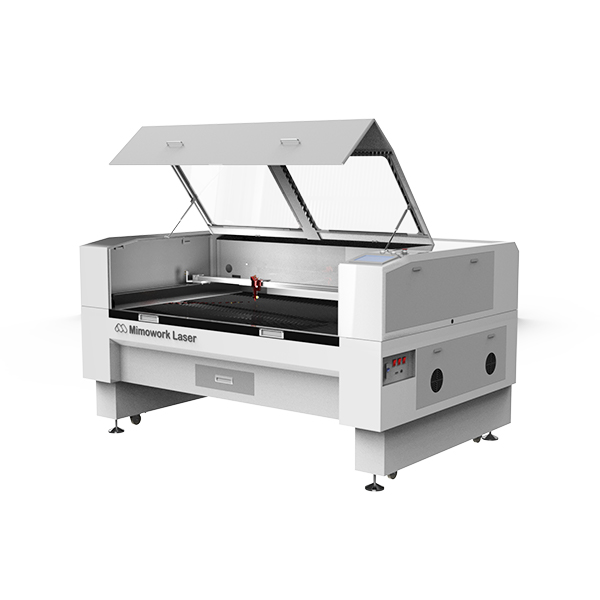
| Engraving & Cutting Area | Working area up to 1300mm × 900mm | Large signage, models, crafts, and paper products cutting. |
| Engraving & Cutting Effect | Fine and rich layered effects | Flexible laser engraving supports adjustable laser power output, enabling diverse and complex patterns and lines with varying depths for personalized wood product customization. |
| Dimension | Specific Parameter/Advantage | Detailed Description |
|---|---|---|
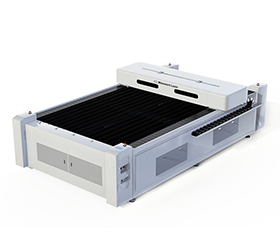
| Engraving & Cutting Area | Working area up to 1300mm × 2500mm | Cabinet door panel cutting, large LED luminous letter panel cutting, wooden relief background wall and decorative partition engraving, corrugated cardboard box die-cutting and blanking. |
| Engraving & Cutting Effect | Fine and rich layered effects | Flexible laser engraving supports adjustable laser power output (150W/300W/450W), enabling diverse and complex patterns and lines with varying depths for personalized wood product customization. |
FAQs
Yes, but with caution. Applying laser masking tape (transfer tape) is a great double-protection method alongside your clear topcoat. However, if your stain or polyurethane sealer hasn't fully cured, the tape's adhesive can chemically bond with the finish and peel it right off when removed. Always ensure the workpiece is 100% dry, and choose a low-tack, paper-based masking tape rather than high-tack plastics.
Adding coats of pigment and polyurethane changes the material's density and thermal reflectivity. A clear coat acts like a tiny shield, absorbing a fraction of the laser's energy. If your usual "bare wood" settings are failing to cut through, you need to slightly increase your laser power (by 5-10%) or lower your speed to compensate for the added layers. This is why the baseline grid test (Tip 5) is non-negotiable.
If your "Stain First" approach yields burnt, dark brown engraving instead of a crisp, pale contrast, your laser settings are too hot. The laser is cooking the wood fibers rather than vaporizing them cleanly. To fix this, increase your speed, decrease your power, or increase your machine's Air Assist pressure. Strong air assist blows away the carbonized particles instantly before they can bake into the groove.
Generally yes, provided they are 100% cured, but you must avoid certain chemicals. Check the ingredient label of your stain. Avoid any products containing PVC, vinyl, or heavy chlorinated compounds, as vaporizing them releases highly toxic hydrochloric gas that can destroy your lungs and corrode your laser machine's rails. Stick to standard water-based or oil-based wood stains, and always run your exhaust fan at maximum capacity.

Do you have any other questions about laser cutting and engraving stained wood?
Post time: Jul-02-2026