
Straightening Fabric Tips and Techniques for Accurate Cutting
Everything you want about fabric lasercutter
Straightening fabric before cutting is a crucial step in the textile manufacturing process. Fabric that is not properly straightened can result in uneven cuts, wasted material, and poorly constructed garments. In this article, we will explore the techniques and tips for straightening fabric, ensuring accurate and efficient laser cutting.
Step 1: Pre-Washing
Before straightening your fabric, it is important to pre-wash it. Fabric can shrink or distort during the washing process, so pre-washing will prevent any unwanted surprises after the garment is constructed. Pre-washing will also remove any sizing or finishes that may be on the fabric, making it easier to work with.

Step 2: Aligning the Selvage Edges
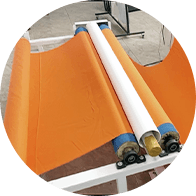
The selvage edges of the fabric are the finished edges that run parallel to the length of the fabric. They are typically more tightly woven than the rest of the fabric and do not fray. To straighten the fabric, align the selvage edges by folding the fabric in half lengthwise, matching up the selvage edges. Smooth out any wrinkles or folds.
Step 3: Squaring Up the Ends
Once the selvage edges are aligned, square up the ends of the fabric. To do this, fold the fabric in half crosswise, matching up the selvage edges. Smooth out any wrinkles or folds. Then, cut off the ends of the fabric, creating a straight edge that is perpendicular to the selvage edges.
Step 4: Checking for Straightness
After squaring up the ends, check to see if the fabric is straight by folding it in half lengthwise again. The two selvage edges should match up perfectly, and there should be no wrinkles or folds in the fabric. If the fabric is not straight, adjust it until it is.
Step 5: Ironing
Once the fabric is straightened, iron it to remove any remaining wrinkles or folds. Ironing will also help to set the fabric in its straightened state, making it easier to work with during the cutting process. Be sure to use the appropriate heat setting for the type of fabric you are working with.
Step 6: Cutting
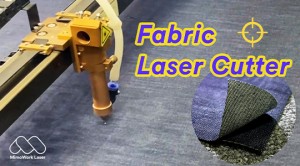
After straightening and ironing the fabric, it is ready to be cut. Use a fabric laser cutter to cut the fabric according to your pattern. Be sure to use a cutting mat to protect your work surface and ensure accurate cuts.
Tips for Straightening Fabric
Use a large, flat surface to straighten your fabric, such as a cutting table or ironing board.
Make sure your cutting tool is sharp to ensure clean, accurate cuts.
Use a straight edge, such as a ruler or yardstick, to ensure straight cuts.
Use weights, such as pattern weights or cans, to hold the fabric in place while cutting.
Be sure to account for the grainline of the fabric when cutting. The grainline runs parallel to the selvage edges and should be aligned with the pattern or design of the garment.
In Conclusion
straightening fabric before cutting is an essential step in the textile manufacturing process. By pre-washing, aligning the selvage edges, squaring up the ends, checking for straightness, ironing, and cutting, you can ensure accurate and efficient cutting. With the proper techniques and tools, you can achieve precise cuts and construct garments that fit and look great. Remember to take your time and be patient, as straightening fabric can be a time-consuming process, but the end result is worth the effort.
Video Display | Glance for Fabric Laser Cutting
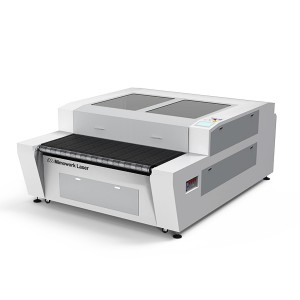
Recommended Fabric laser cutter
FAQ
Proper fabric straightening ensures accurate, consistent laser cuts. Here’s why:
Avoids Distortion: Misaligned fabric (twisted grainlines) causes laser-cut patterns to skew, ruining symmetry—critical for garments.
Maximizes Efficiency: Straight fabric lays flat, letting laser cutters (like MimoWork’s) follow patterns precisely, reducing material waste.
Ensures Clean Cuts: Wrinkles or folds in unstraightened fabric can trap laser heat, leading to burnt edges or uneven lines.
Pre-washing is key for consistent laser cutting. Here’s its role:
Stops Shrinkage: Unwashed fabric may shrink after cutting, warping laser-cut patterns—critical for fitted items like sportswear.
Removes Chemicals: Sizing in new fabric can melt under laser heat, leaving residue on cutters (like MimoWork’s) or fabric.
Softens Fibers: Makes fabric lay flatter, improving laser focus and cutting precision.
Specific tools enhance fabric straightening, pairing well with laser cutters. Here’s what works:
Large Flat Surfaces: Cutting tables (matching MimoWork laser bed sizes) let fabric lay flat, easing alignment.
Pattern Weights: Hold fabric in place, preventing shifts that disrupt laser paths.
Straight Edges/Rulers: Ensure grainlines align with laser cutter guides, critical for consistent pattern cutting.
Iron with Fabric-Specific Heat: Sets straightened fabric, maintaining flatness during laser processing.
Any questions about the operation of Fabric Laser Cutter?
Post time: Apr-13-2023